Tuesday, December 24, 2013

OWH - Penguin

Sandy gave us a challenge to send a penguin card since one of the Generals wanted them for his team.  She was worried we would all use the same penguin stamp.  No problem for me, I do not have a penguin stamp.  But my niece loves penguins, so I have had a bunch of cut out templates around and came up with this.

Cheers!

Thank you for looking.

Saturday, December 7, 2013

OWH - December Daily Bread Challenge

For the Daily Bread December Challenge, what could be more manly than a guy watching TV, wearing comfy clothes and drinking a beer.  This is an Art Impressions stamp and I love them because they always make me smile.  This card is in my box to go to OWH and hopefully make someone smile . . .

Thank you for visiting.

Wednesday, November 20, 2013

Online Classes - Holiday Workshop - Day Five


For the his and her assignment, I knew exactly what I could do with the dies I have on hand.  Those circle dies were the best thing I ever bought.  These were fun to do making one just a little fussier than the other.  Enjoyed today's class, masculine cards are a challenge for us all.

Thank you for looking.

Tuesday, November 19, 2013

Online Classes - Holiday Workshop - Day Four Again!


After reading Day Four's assignment, I completely missed the boat with my other submission.  Stretch your stamps was the cry, use regular stamps for Christmas or use Christmas stamps for other cards.  Looking through the gallery, I was not the only one.  This is made with an OWH stamp set for the world.  I am having fun with the A2 curved edge die.  It can change the look of any card very quickly.

Thanks for looking.

Monday, November 18, 2013

Online Classes - Holiday Workshop - Day Four


My first thought was to combine several of the techniques today into one card.  I could not come up with several words to run down on this card, but thought the "cheer" message was so clever since Santa was holding a glass of wine.  I did try stamping a pattern through the gold embossed message, but it just did not work.  I added a stamped dash line around the edge.

The hardest part of this card, was taking the picture.  Much taller than I am used to.

Thanks for looking.

Friday, November 15, 2013

Online Classes - Holiday Workshop - Day Three

They said these were easy cards and today, I have to agree with them.  This was the fastest new technique I have ever tried.  I used thin foam on the big star and the little one for added dimension.  Fun technique, I have to remember this one . . .

Thank you for looking.

Thursday, November 14, 2013

Online Classes - Holiday Workshop - Day Two


Great examples today from Jennifer McGuire and Debby Hughes.  I have a very small assortment of holiday dies and stamps.  But this die cut is all one level.  The wreath is a movers and shapers die so it was difficult to line them up for cutting, but I got it done!  However, since the center of the wreath punched as a shape, I am missing the window bars across the center. But in my eyes, it is perfect!

Thank you for looking.

Online Class - Holiday Workshop - Day One

Add caption

So much fun to be back to the Online Classes.  To tie the inside with the outside, I took the letters from "holidays" and put them in the jar.  Vellum is a challenge, but when I cut it out, I left tabs to wrap around the lower card stock.  

Why did I use the word "holidays'?  There are no repeating letters!

Thank you for taking a peek!
 

Saturday, November 2, 2013

OWH - November Daily Bread Challenge


The challenge for November is Love or Valentine cards.  Never sure when I will get my cards mailed to OWH, I felt safer just making a love card.  You cannot see in the picture, but I covered the LUV U with glossy accents to make them stand out.

Visit the Operation Write Home blog here to see more fabulous cards.  If you can, please post a card to that blog and Sandy will earn some free postage money and you have a chance to win a prize.  Win Win for everyone!

Thank you for visiting.

Monday, October 14, 2013

OWH - October Daily Bread Challenge


The challenge for October is to make the sentiment the center of attention.  A comment like this will get your attention!

Visit the Operation Write Home blog here to see more fabulous designs!   If you have time, help out and post a card to that blog.  Thank you for visiting.

Friday, September 27, 2013

Insider - Day Three


I would love to get a card with a surprise inside!   This came together quickly because when you use black and white as a color scheme, less color matching.  So many great ideas in class today, it was hard to decide what to do.  Like yesterday, there are three pages to allow the sender to write a message.   The vellum envelope is for the surprise!


Another great card to send in my box to the OWH.  Thank you for looking . . .

Thursday, September 26, 2013

Insider - Day Two


So many ideas and so little time!  But I had the window die and I love to use it.  This is two cards with the back two pages glued together so it gives a plain white section when you turn the tree page to write a message.  I am happy how this turned out and I will include it in my box of cards to the OWH since it will meet the qualifications.

Thanks for looking . . .

Wednesday, September 25, 2013

Insider - Day One


First day of Insider Class, they had so many great ideas to dress up the inside, without classifying it as a certain message.  I made this card back in Summer School classes and just put a die cut on the inside.  When you shop, don't you think of shoes?

Below is the front of the card.
Thank you for visiting . . . 

Monday, September 23, 2013

OWH - Sketch Challenge #191


I have spent lots of time recently reading about the Operation Write Home program and think it is a wonderful way to share the cards I make.  This is my first entry into the Sketch Challenge #191.  When I saw this old scrap of paper, I knew exactly my message.  I will include this in my first box of cards I plan to send to OWH.  I have so many ideas and am glad to do something for all the soldiers who do so much for us each day.

Friday, July 26, 2013

Summer Card Camp 2 - Week 3 - Day 5


I love black cards!  So todays new color groups suited me just fine.  I embossed with silver and gold, hard to see the shine.  But the sentiment seems to fit my mood today, being the last day of class, I will be missing all of this and you next week!

Thanks for visiting . . .

Thursday, July 25, 2013

Summer Card Camp 2 - Week 3 - Day 4


I knew immediately what I would do.  Have you seen many flowers on any of my cards?  Most of my stamps and dies are objects, not flowers.  This came together pretty easily and I felt only one message would work with this.  When you open the card, the message is there!   Love and flowers seem to go together!

Thank you for visiting. . .

Wednesday, July 24, 2013

Summer Card Camp 2 - Week 3 - Day 3


I thought Kim's card was so cute, I headed in that direction.  I discovered if I mix blue ink and red ink, I get purple!  It took a couple of trys to get the right shade.  I have a layer of brown paper in the card for the peek through, but the area to write on is the inside white.  Fun, fun, fun!

Thank you for visiting . . .

Tuesday, July 23, 2013

Summer Card Camp 2 - Week 3 - Day 2 again


With some extra time today, I vowed to make a second card in less than one hour.  Almost did it, but fiddled with the paper choices a little too long!  I was so inspired by all the designs today, I just had to make one more.  The shopping bag die is from Memory Box and was shocked to see it eat right through heavy cardboard.  I did it twice to give the bag more weight.

I don't know about you, but I would love to get a card that says "shop".  I would run right out and do it!

Thanks for visiting . . .

Summer Card Camp 2 - Week 3 - Day 2


This is what I love about these classes, learning a new technique.  I would have never thought of embossing a die cut and it was really pretty easy and had stunning results.  I used a dark brown paper behind the embossing.


The little purple leaves were a bit tedious, but I think they look great.  I added a drop of glitter to give them some dimension.  I will use this technique again and again.

Thank you for visiting . . .

Monday, July 22, 2013

Summer Card Camp 2 - Week 3 - Day 1

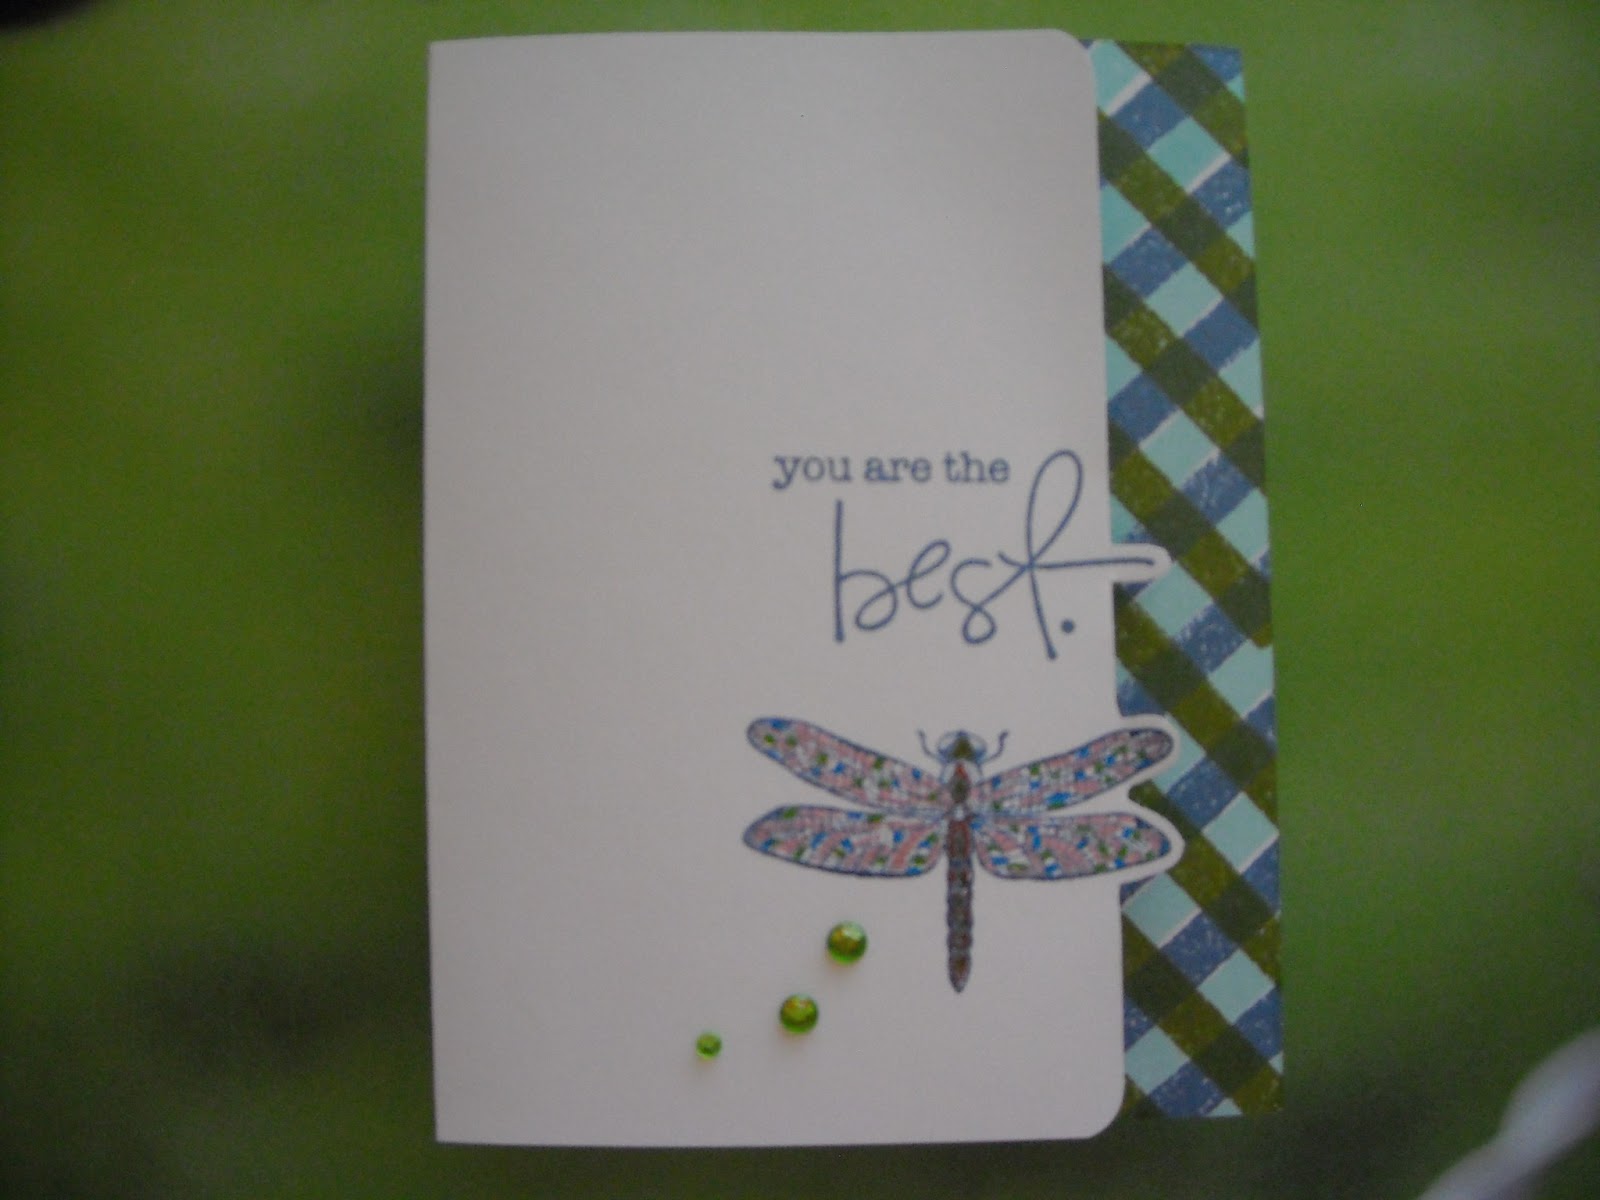
Have you ever seen a purple bird?


You have now!  This card came together very quickly.  I love the twine, it really gives it some texture.  I made the banner stamp out of a piece of foam and then stamped it with white ink.   Pulling paper through dye colors is so much fun.  You never know what you are going to get. The wings are actually lighter, but I folded them up and the photo just does not capture the variance in color.

Sad to see we are on our last week.  I have enjoyed this class so much.

Thank you for visiting . . .

Friday, July 19, 2013

Summer Card Camp 2 - Week 2 - Day 5


More colors just gives me more choices!  I used the last color group with the blues and green.   I wanted to try the card from Day 3 this week, stamping a plaid background.  It took some time to do, but the finished product was pleasing.  I added the green embellishment at the end, to cover up a smudge!

Thank you for visiting . . .

Thursday, July 18, 2013

Summer Card Camp 2 - Week 2 - Day 4


I thought today's lesson was so clever and it immediately challenged me.  The greeting comes from the December 2012 card of the month kit.  The numbers were die cut from foam and the daubs on the bingo card were an eraser.  All things I have learned in camp.  I did a "Jennifer" and added that one strip of brown to finish off the card.

Living in a gambling town, a friend of mine who loves to play bingo is recovering from a serious illness.  48 is the year she was born and also the winning number for this bingo card.   I think she will enjoy this card!

Thanks for visiting . . .

Wednesday, July 17, 2013

Summer Card Camp 2 - Week 2 - Day 3


The minute I saw Kelly's shaker box card, I knew exactly what I was going to do.  I can't believe I was embossing on vellum again, but I hated to cover the paper and the confetti.  The dots on the frame are my new enamel accents.  They shine and are raised up - I love them.  The reindeer is a die cut and I pieced a sweater on him, Rudolph that is!   All the guest artists today had some great ideas.

Thanks for visiting . . .

Tuesday, July 16, 2013

Week 2 - Day 2 - Card 2

My second effort


I seemed to have some extra time today and did one more card, inspired by all the embossing techniques.  I used an embossing pen on the petals before I folded them into the rosette.  I used brown ink on vellum and just hurried to the clear embossing powder and it worked!

Thank you for visiting . . .

Summer Card Camp 2 - Week 2 - Day 2

Two cards today!

I am enjoying the embossing techniques.  Most of my stamps are Tim Holtz and I thought these would work.  The photo does not show the shine from the embossing, but it did resist the distress pen shading.  I colored some silver sequins the blue color.  A trick I have discovered is I use a metal dental pick and put it in the center hole and that holds the sequin while I color it. They are so tiny and uncooperative, this holds them down.  My fingers are no longer colored too!

Thank you for visiting . . .

Monday, July 15, 2013

Summer Card Camp 2 - Week 2 - Day 1


I love the colors for this week and the sketches look inspiring.  This card came together fairly easy as I pretty much duplicated Kristina's efforts.  But, this is for my husband who after 5 days last week, has looked at so many cards, gets one for himself!  The cute "i love you" stamp, believe it or not, was in the Walmart 97 cent bin.  What a find!

Thank you for visiting . . .

Sunday, July 14, 2013

Summer Card Camp 2 - Day 5


I have to say this is the third sketch layout - otherwise you might have never figured out what I was doing.  I think there is a reason not too many people have done that sketch, I found it difficult to interpret.  I used the bonus color selection number 5, of greens and purples.  I pieced scraps of purple together to cut out the stars.  I have learned the tone on tone stamping in these classes and enjoy the subtle look it gives.  It takes a plain piece of paper and makes it magical.

I enjoyed last week so much.  All the nice comments people have left on my blog certainly added to the excitement.  Thank you . . .

Friday, July 12, 2013

Summer Card Camp 2 - Day 5

 I used color selection number two since I like the brown and black.  The window is a great idea and for some reason, it seemed to take a long time to pull together.   I did not follow a sketch, I just followed Kristina!  It is hard to see in the photo, but the brown is done in a wood grain embossing.  Looked like a tree to me so out came the owl!

Thank you for visiting . . .

Thursday, July 11, 2013

Summer Card Camp 2 - Day 4


I loved this challenge.  It was fun to watch the teachers rush around!  This is a Bigz die and I cut 2 white ones (back and the front for mounting the colors to) and 5 different color papers.  I glued all the pieces together and attached to the card back.  Inside is not much room to say anything, but I figured the front said it all.  Ten minutes?  Not quite.  I did it in 10:52 and eliminated doing the stamp in embossing powder.  My card today saved me probably two hours!!

I bought a big 12 x 12 pack of paper of photo real shots.  It has never worked for any cards since the designs are way too big.  But, I pick out a complimentary one for the picture I take each day of my cards.  That looks like ribbon, but is just paper . . . .

Thanks for visiting.

Wednesday, July 10, 2013

Summer Card Camp 2 - Day 3


Thinking outside of the box, I die cut the ends of the tabs as something different.  My camera is a Tim Holtz mover and shaper die and I cut out it out of a plastic peanut can lid.  It has a nice vinyl shine and some thickness.  These steel cut dies go through anything.  It is fun to spot a new thing to cut from.   Enjoying all the tips we are learning from teachers and each other!

Tuesday, July 9, 2013

Summer Card Camp 2 - Day 2

The challenge of this class is to make do with what you have!  I used a pretty solid background stamp to drag for the stripes.  I colored it with stamp markers to get the "class colors".   This is a wonderful technique and I will use it again.

Monday, July 8, 2013

Summer Card Camp 2 - Day 1

I got lucky!  I found some paper with all the colors of the challenge.  As Kristina implied, I turned it around for a different angle.  I made a stamp out of the die cut so I could also stamp the word "happy".  My thick happy has 2 layers of styrofoam from plates from the dollar store.  The  foam cuts easily and adds dimension.  The lady reminds me of a waitress in an old diner.  I love it!

Friday, June 28, 2013

July 4th Card for "Anything Goes Challenge"

My "flowers from flowers" idea inspired this card.  Sometimes all you need is some inspiration.
Have a Happy Holiday!  This is for the "Anything Goes" challenge at Simon Says Challenge.

Making Flowers from Flowers


I bought these silk flowers for my 4th of July dinner table decor and was so glad that the original bouquet was too big.  I die cut the extra flowers in the Tim Holtz Tattered Floral Die and cut the two smallest sizes.  I assembled alternate colors with foam spacers.  So cute and it inspired a card.

Tuesday, June 18, 2013

Pre Class Challenge Two


The second challenge was fun since we only had to follow a layout and we were free to choose our color scheme.  Come to think about it, I don't have any shoes in this color !!

A Blog Named Hero Challenge


I was inspired by the images for the Blog Named Hero.  With the 4th of July just around the corner, we are reminded of the freedom we have in this country and that our Armed Forces are responsible for that.  Thanks!

To make the dog tag, I typed out text with my old Dymo labeler and put thin aluminum tape over it and rubbed the image.  Looks pretty authentic, huh?

Monday, June 10, 2013

Pre Class Challenge One, #2


This qualifies with everything but gray!  I only have one small scrap of gray paper.

Sunday, June 9, 2013

Pre Class Challenge One


The colors were a challenge but that is what this is all about.  I look forward to classes and making new friends.

A great card!

I love my husband, but sometimes this card makes sense.

Hi!

I love making cards and I thought this would be a great way to share them with friends and family.  Enjoy  . . . .